Guide
PhotoGeoMap
Upload photos, create albums, share maps, and join the community.
User Operation Guide
Upload photos, build albums, and share your map with the community.
PhotoGeoMap turns photos with location data into interactive maps. This guide explains the basic workflow from upload to public sharing.
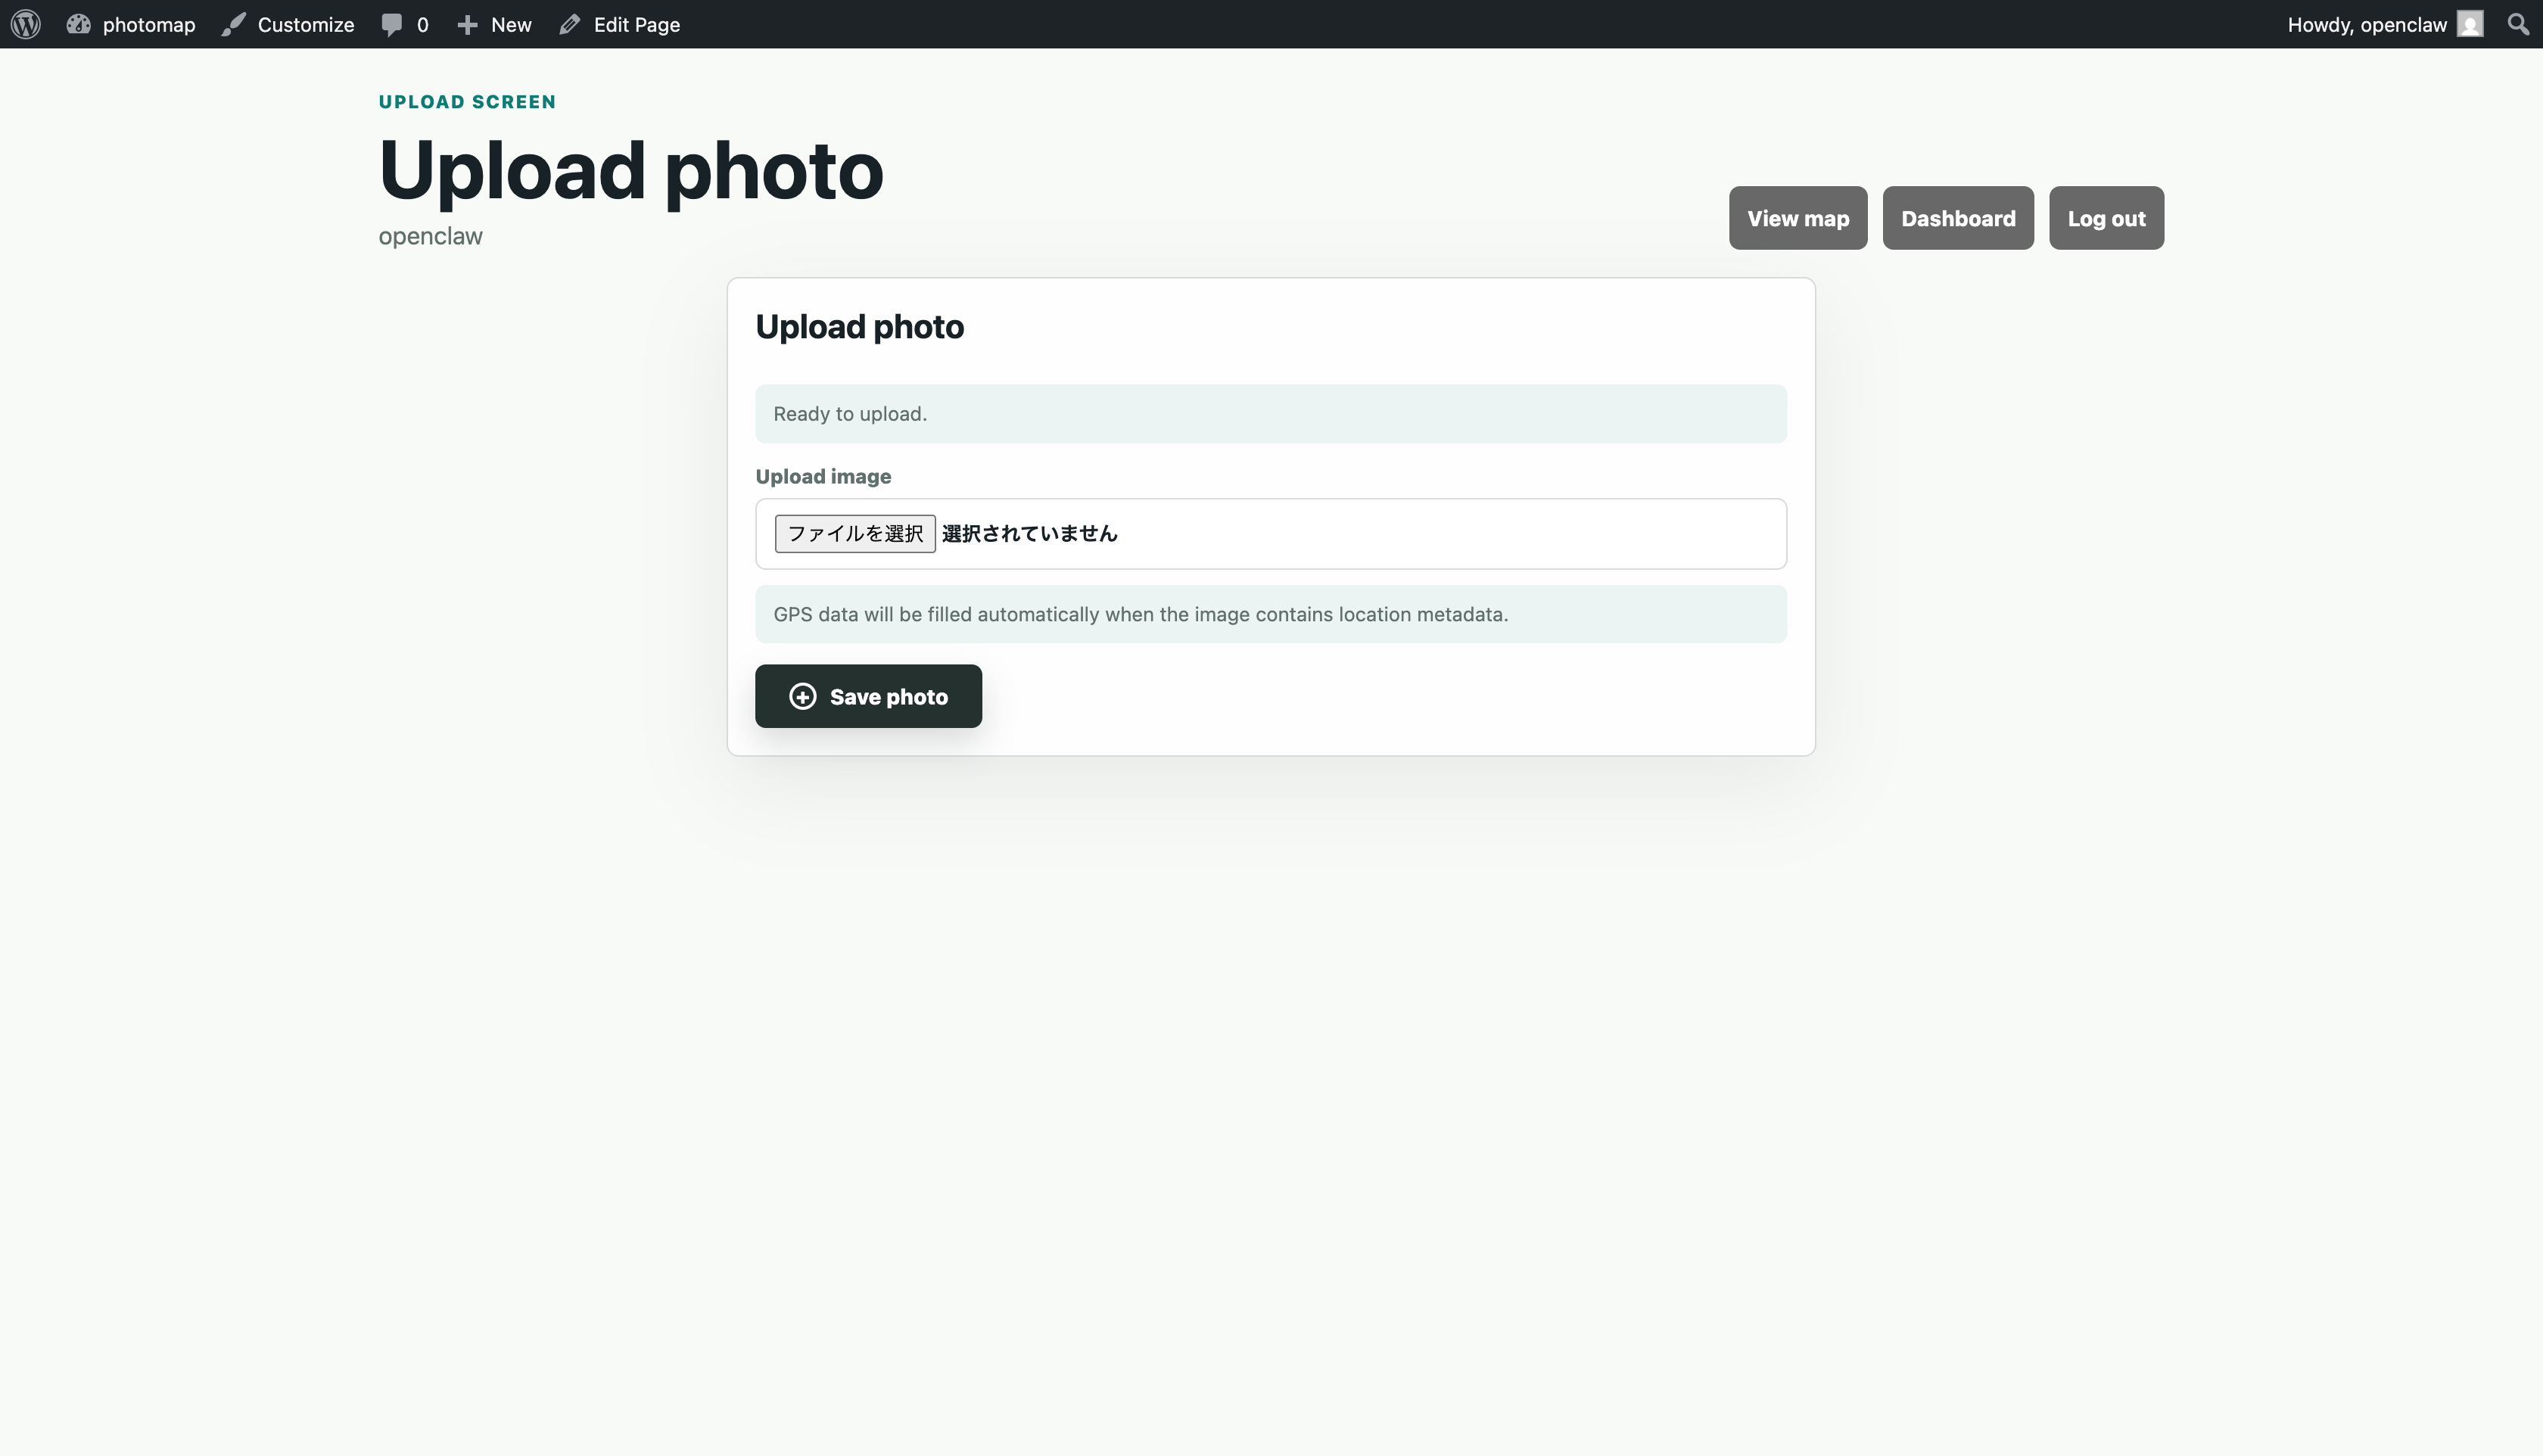
Upload photos
- Log in. Open PhotoGeoMap and choose Login from the menu.
- Open Upload photos. Use the upload button in the map menu or the dashboard.
- Select an image. The image file is the only required field.
- Let GPS fill automatically. If the image contains EXIF GPS data, latitude and longitude are filled for you.
- Add optional details. You can add title, caption, album, or a fallback image URL. Captions can include links.
- Save photo. After saving, the photo appears on the map if coordinates are available.
Tip: if GPS is missing, enter latitude and longitude manually before saving.
Visual walkthrough
Create and manage albums
- Open Dashboard. Albums are managed from the owner dashboard.
- Create an album. Enter an album name and optional description.
- Assign photos. When uploading or editing a photo, choose the album.
- Rename or delete. Existing albums can be renamed or deleted from Your albums.
- Use Default Album. Photos without an assigned album are placed in Default Album automatically.
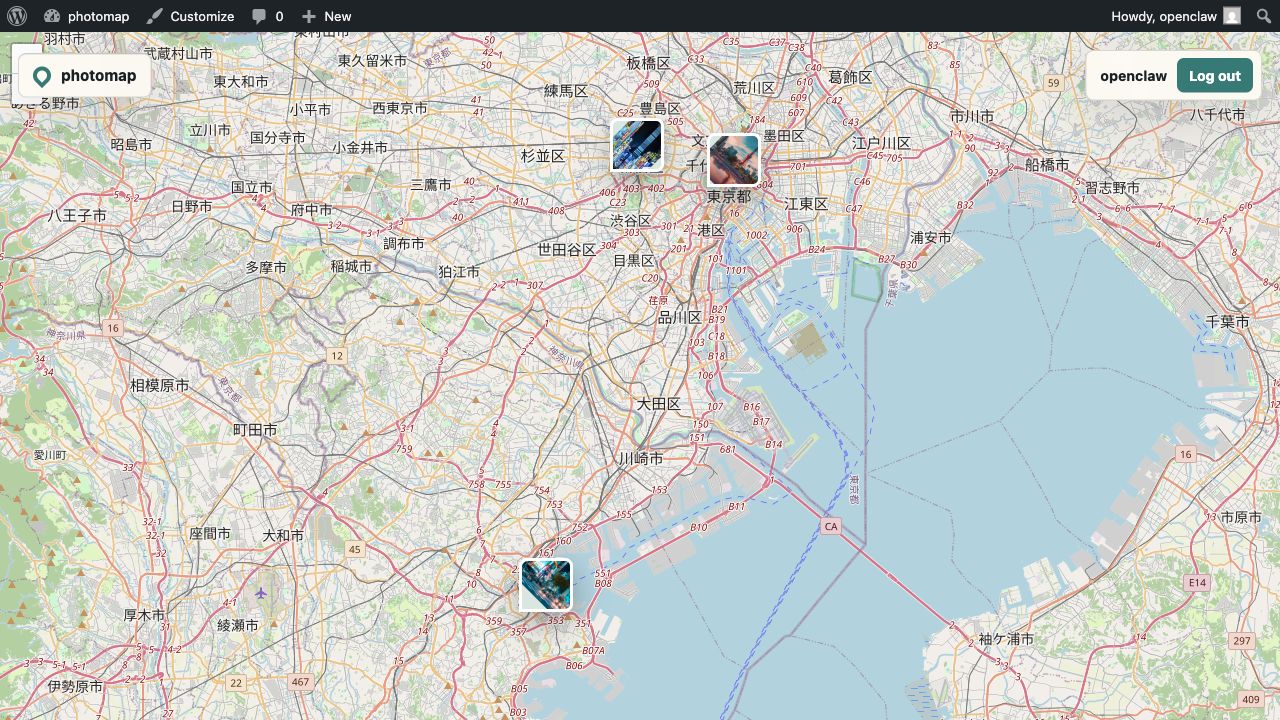
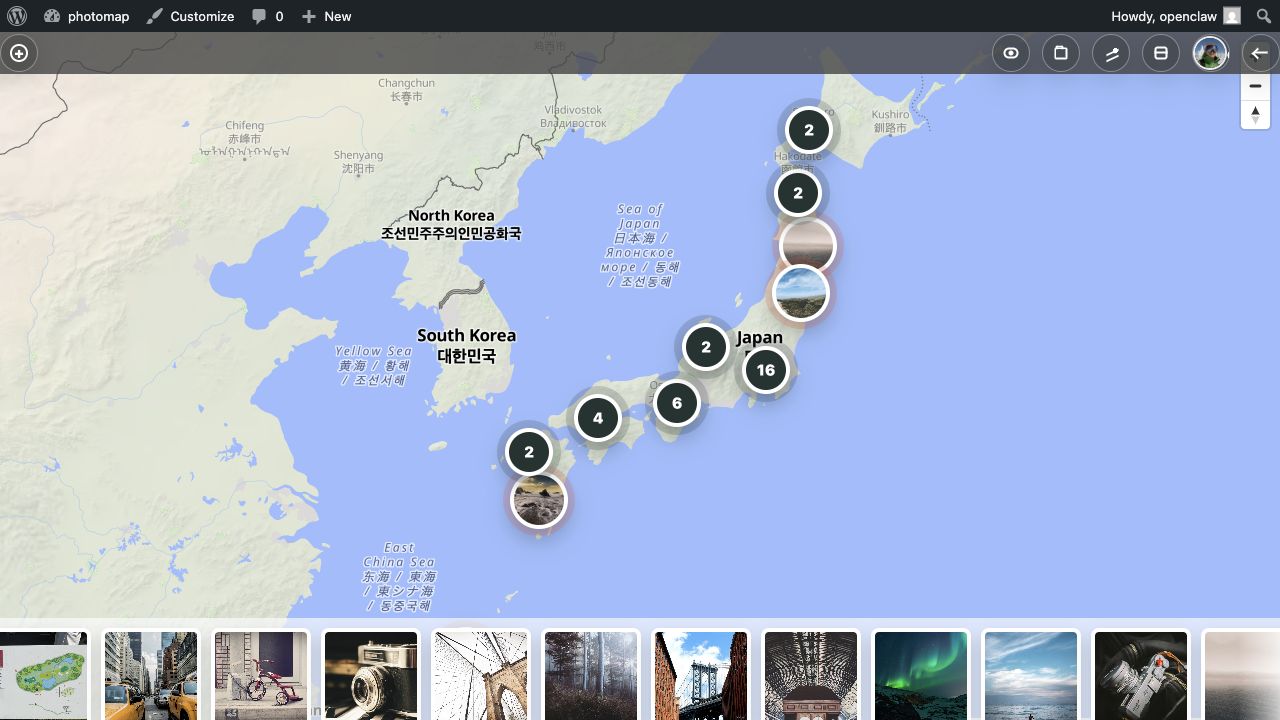
View the map
Visitors can view public maps without logging in. Logged-in users see their own photos by default. Use View all to show all photos that belong to the current map owner, or choose an album to focus the map on a specific area.
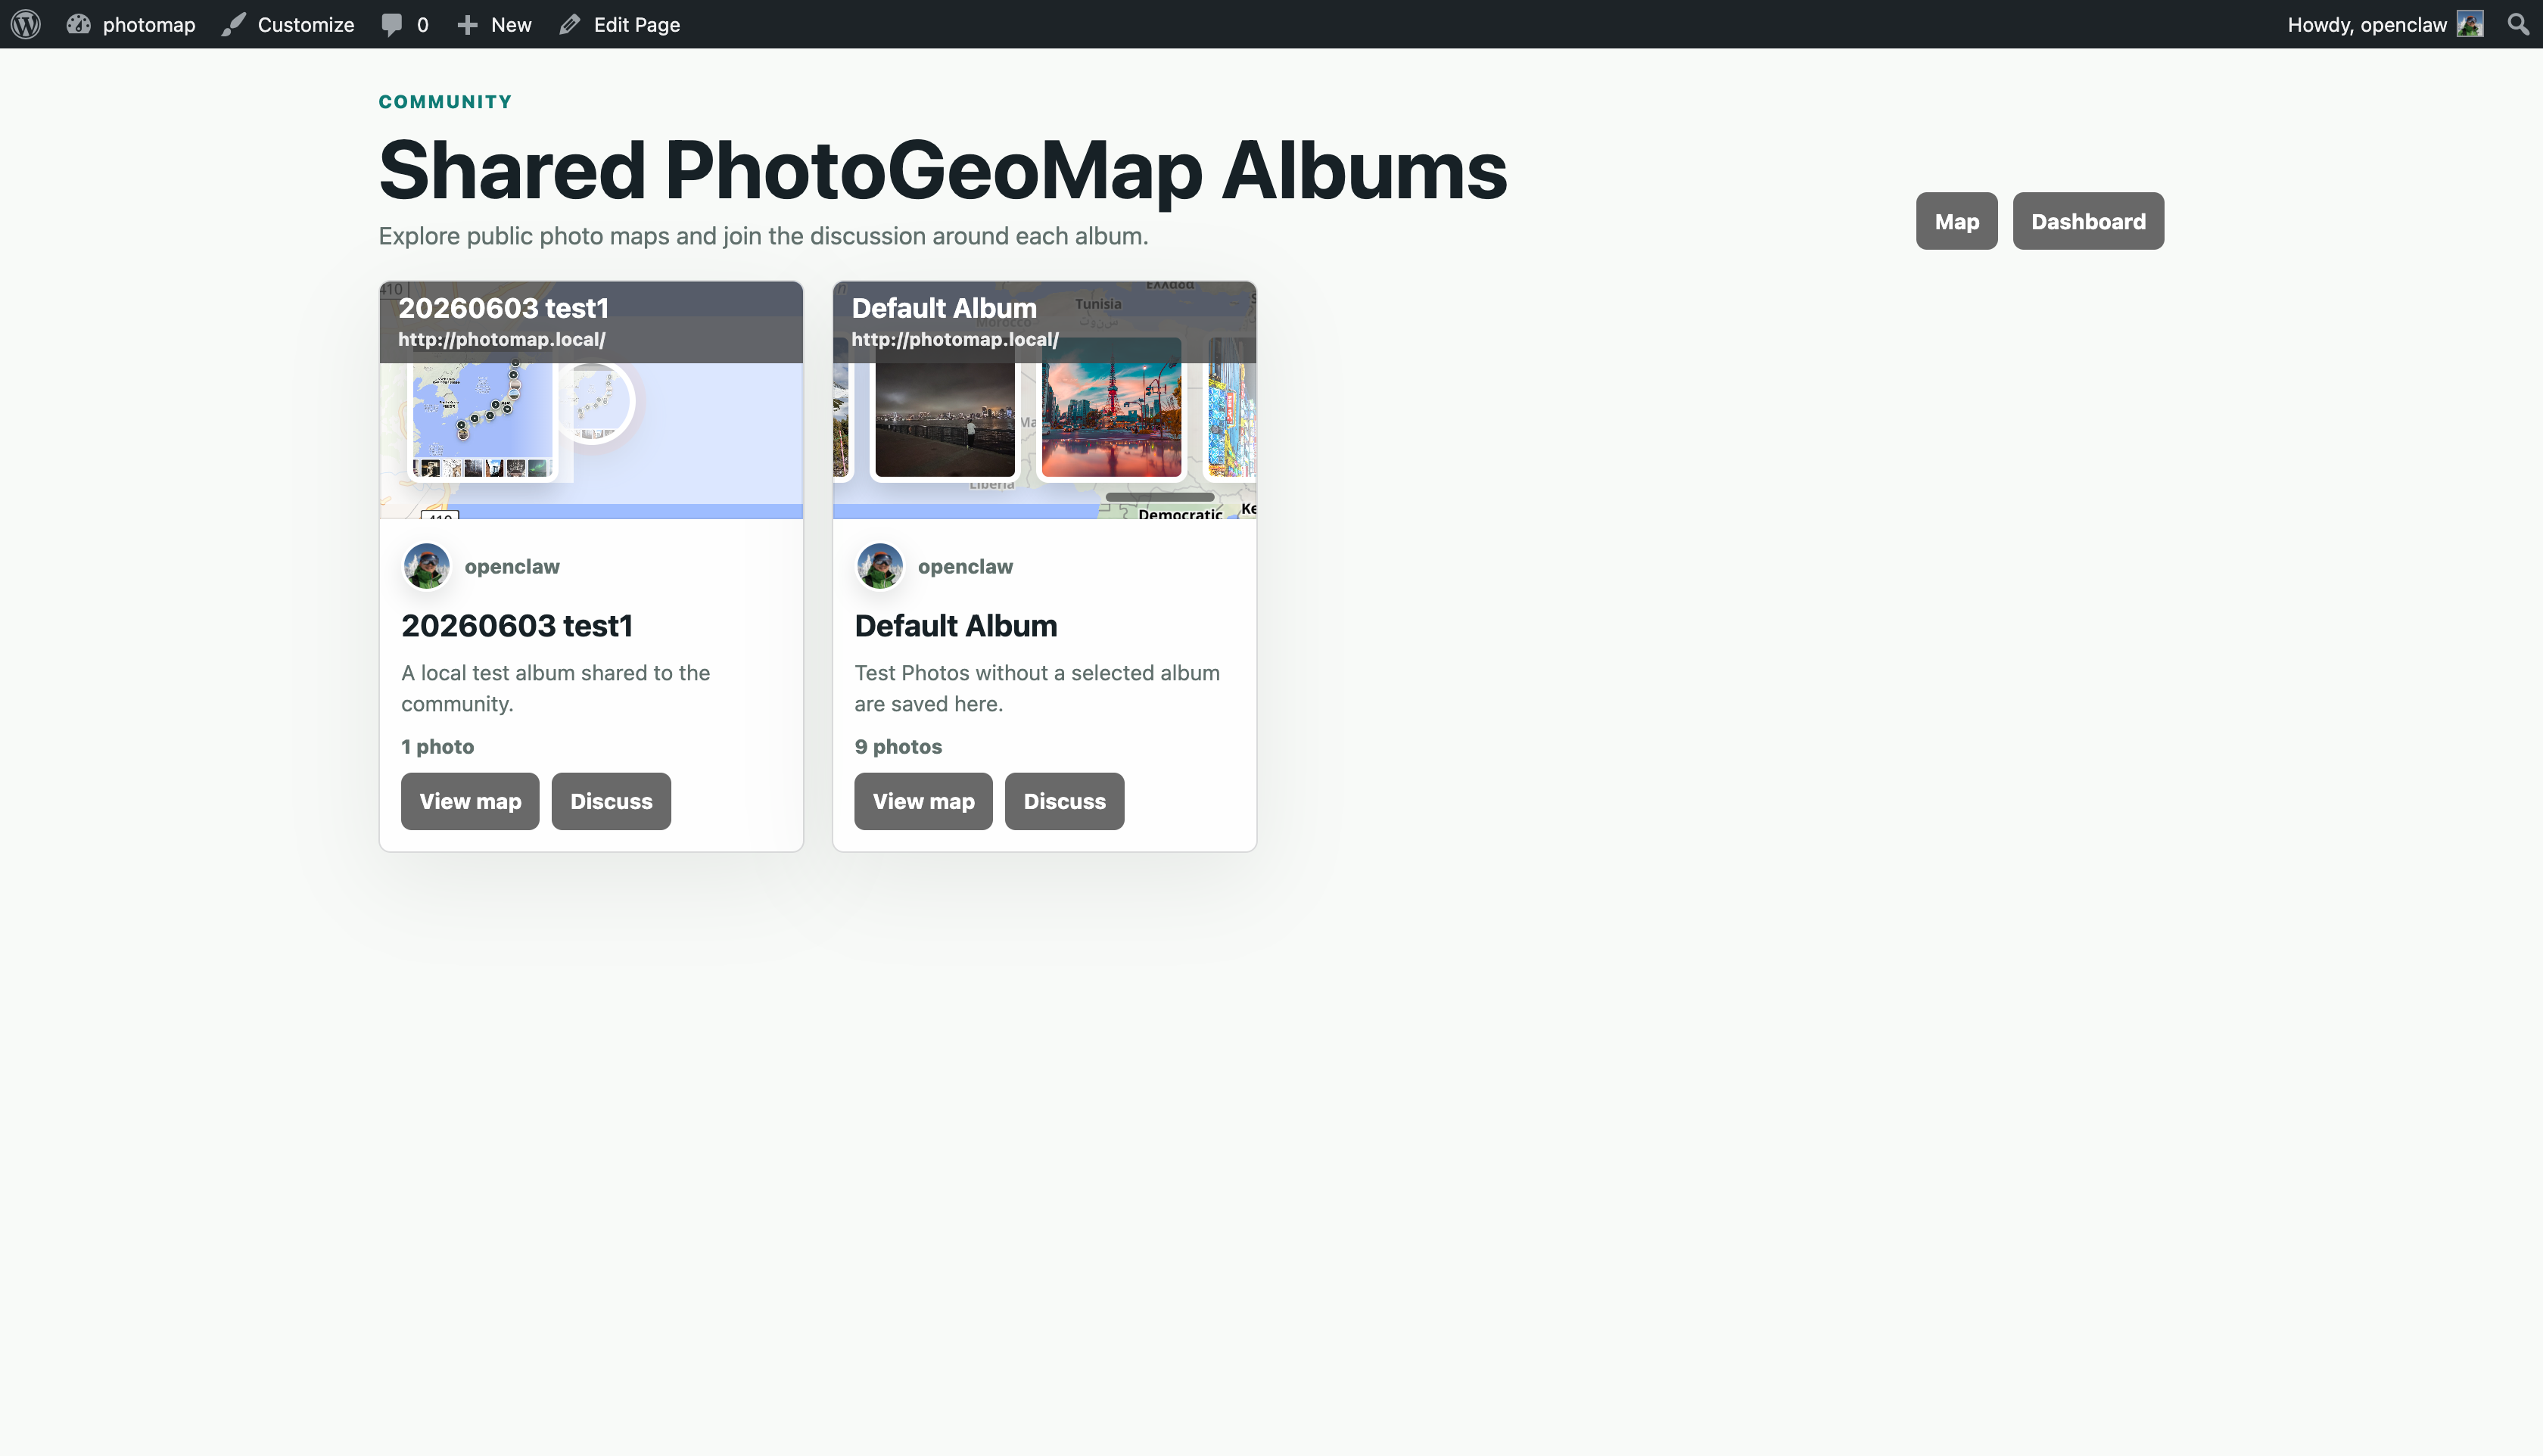
Share an album with the community
- Open Dashboard. Find the album under Your albums.
- Enable community sharing. Check Share this album in Community.
- Add a community description. Explain what the album is about.
- Save settings. The album appears on the Community page with a map preview.
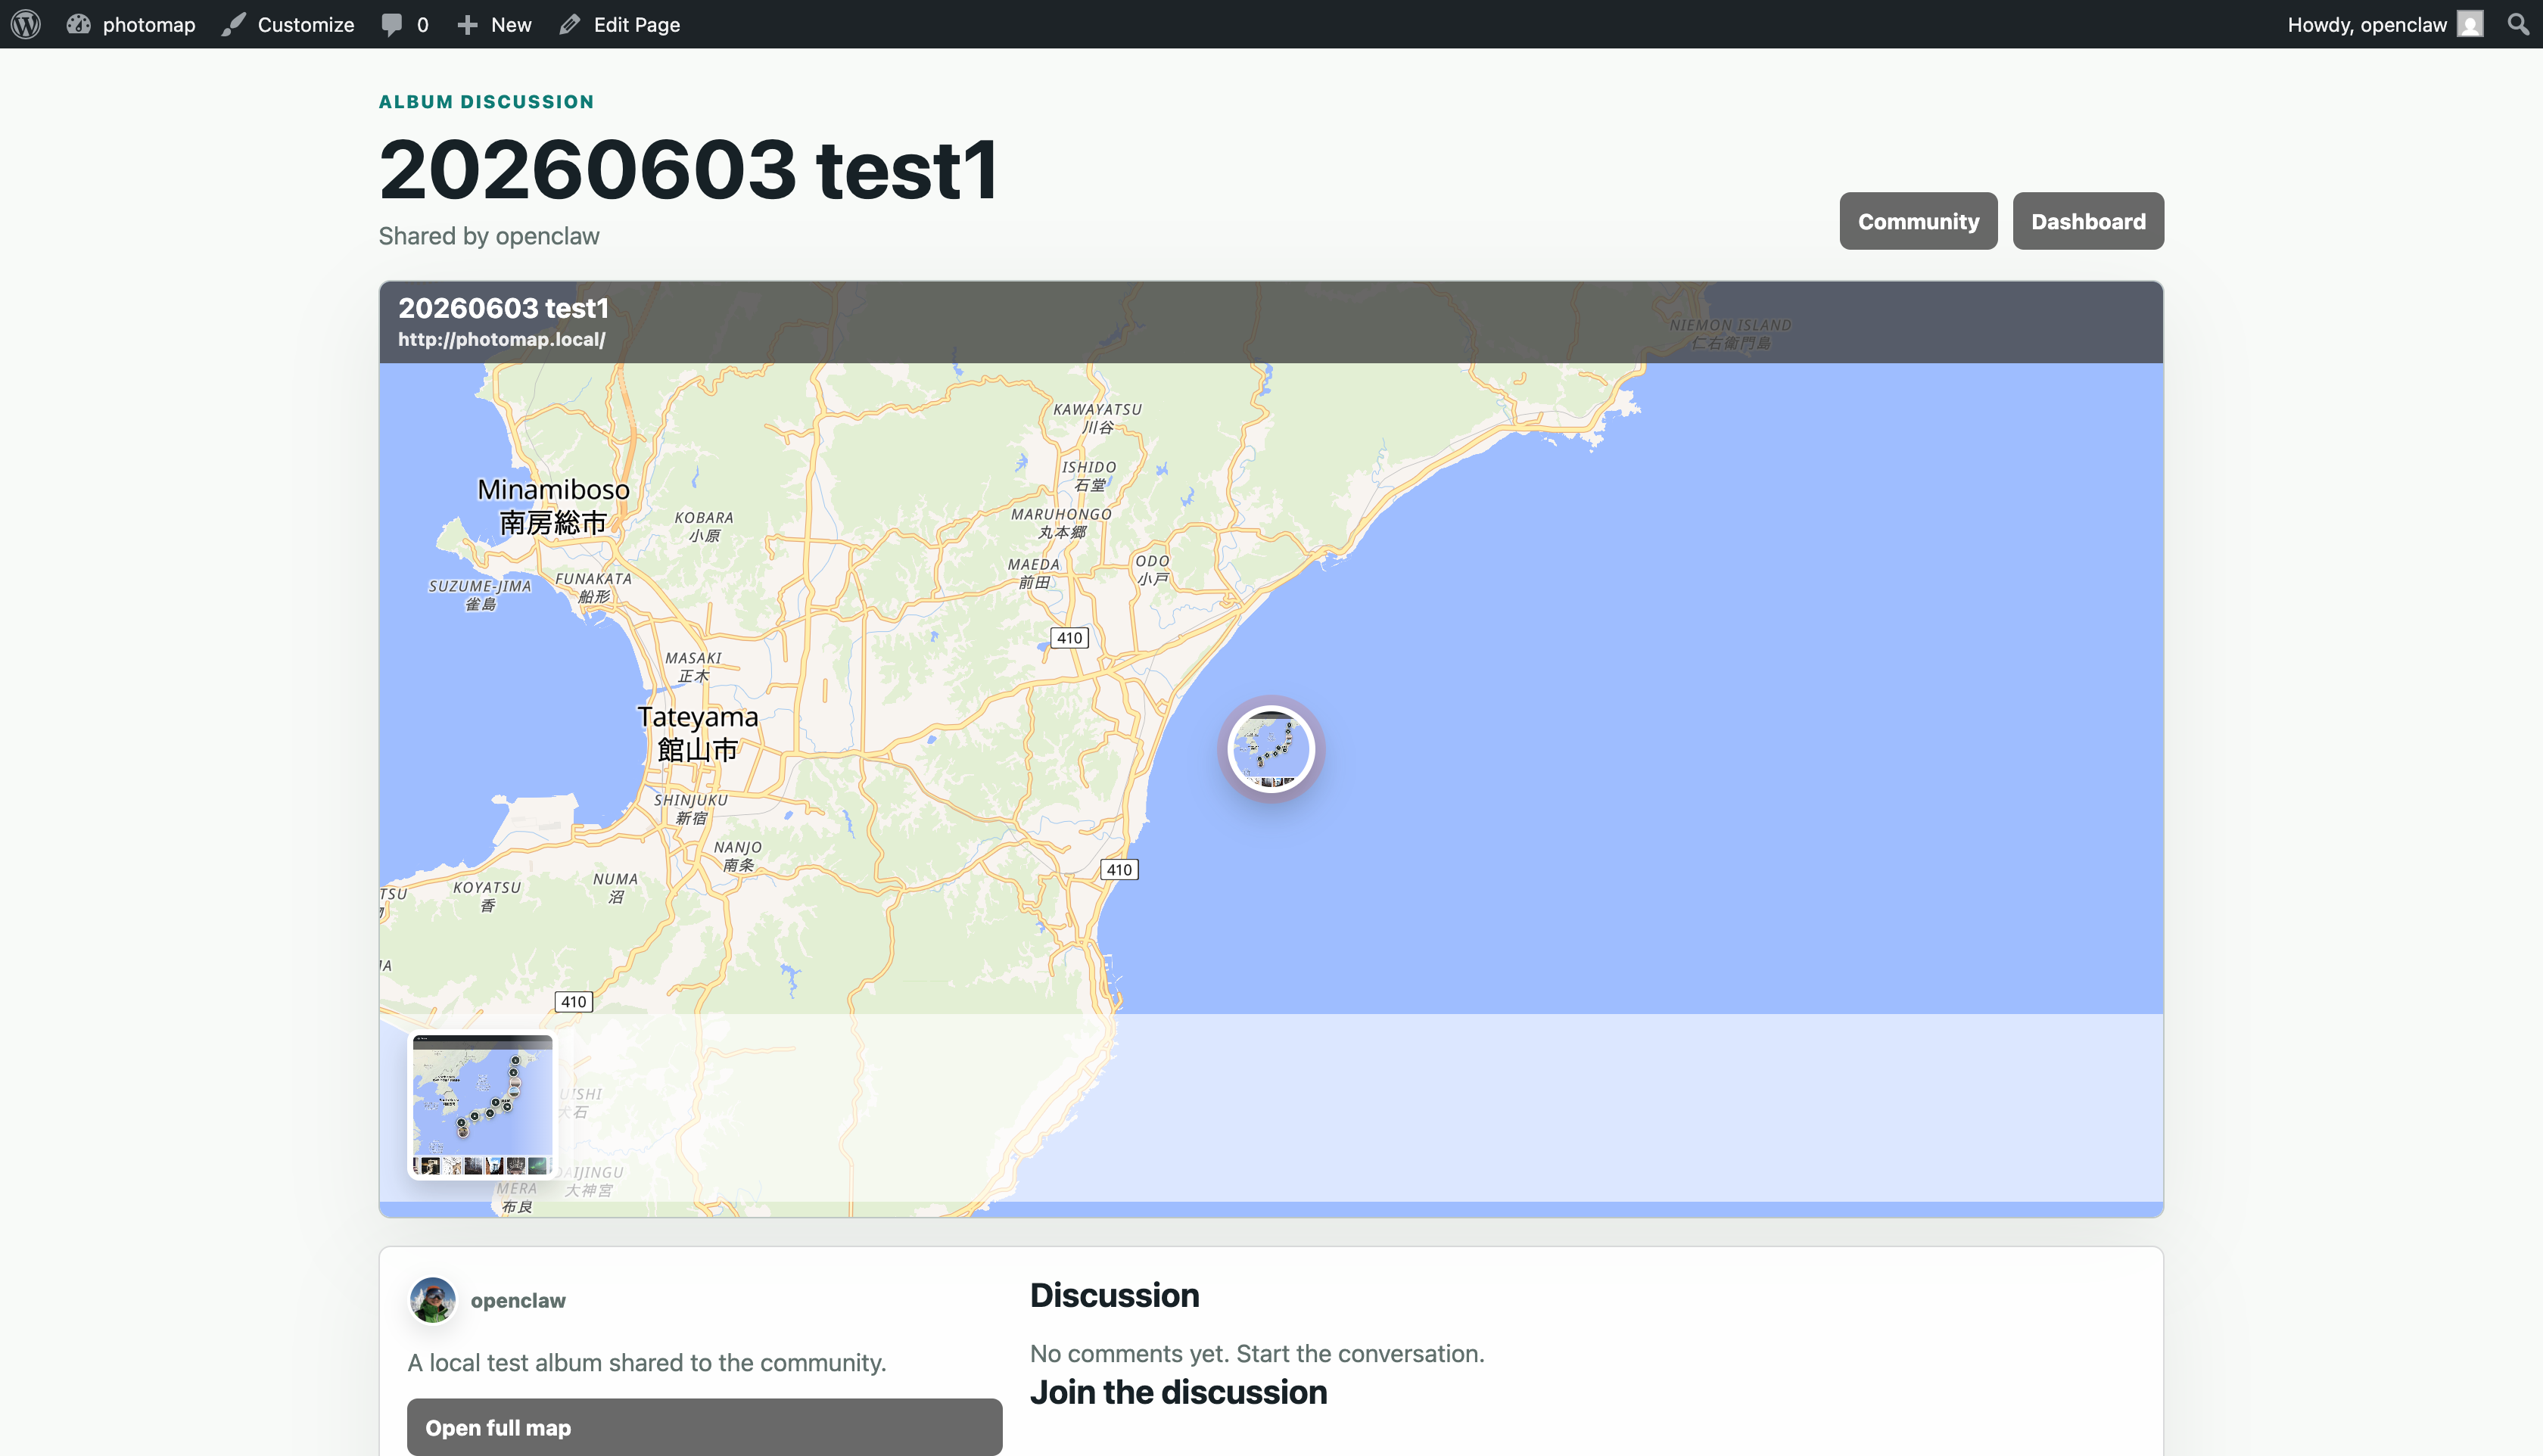
- Open Discussion. Each shared album has its own discussion page.
Discuss albums
On an album discussion page, visitors can view the embedded map and read comments. Logged-in users can post comments and reply to other comments. The comment avatar uses the same avatar uploaded in PhotoGeoMap.
Use cases
- Travel diary: upload trip photos and share a route-style map with friends.
- Family album: create family albums and send public viewing links to relatives.
- Event map: collect photos from a festival, school event, or meetup and discuss them in one place.
- Location portfolio: photographers, guides, and local businesses can present work by place.
- Field survey: record site photos with GPS and organize them by project album.
- Community discovery: share public albums so others can explore and comment.
用户操作指南
上传照片、创建相册,并把地图分享给社区。
PhotoGeoMap 会把带有位置信息的照片显示在交互式地图上。本指南介绍从上传照片到公开分享的基本流程。
上传照片
- 登录账号。打开 PhotoGeoMap,在菜单中选择 Login。
- 打开上传页面。可以从地图菜单或 Dashboard 进入 Upload photos。
- 选择图片。图片文件是唯一必填项。
- 自动读取 GPS。如果照片包含 EXIF GPS 信息,系统会自动填入纬度和经度。
- 填写可选信息。可以添加标题、说明、相册或备用图片 URL。说明文字可以包含链接。
- 保存照片。保存后,如果有坐标信息,照片会显示在地图上。
提示:如果照片没有 GPS 信息,可以手动输入纬度和经度后再保存。
截图操作说明
创建和管理相册
- 打开 Dashboard。相册管理在用户 Dashboard 中完成。
- 创建相册。输入相册名称,也可以填写说明。
- 分配照片。上传或编辑照片时选择对应相册。
- 重命名或删除。在 Your albums 中可以重命名或删除已有相册。
- 使用 Default Album。没有指定相册的照片会自动进入 Default Album。
查看地图
访客不登录也可以查看公开地图。登录用户默认看到自己的照片。使用 View all 可以显示当前地图拥有者的全部照片,也可以选择某个相册,让地图聚焦在某个区域。
把相册分享到社区
- 打开 Dashboard。在 Your albums 中找到相册。
- 启用社区分享。勾选 Share this album in Community。
- 填写社区说明。介绍这个相册的内容。
- 保存设置。相册会出现在 Community 页面,并显示地图预览。
- 打开 Discussion。每个共享相册都有自己的讨论页面。
相册讨论
在相册讨论页面,访客可以查看嵌入式地图并阅读评论。登录用户可以发表评论,也可以回复其他评论。评论头像会使用 PhotoGeoMap 中上传的同一个头像。
使用场景
- 旅行日记:上传旅行照片,把路线式地图分享给朋友。
- 家庭相册:创建家庭相册,并把公开查看链接发给亲友。
- 活动地图:收集节日、学校活动或聚会照片,并集中讨论。
- 地点作品集:摄影师、导游、本地商家可以按地点展示内容。
- 现场调查:记录带 GPS 的现场照片,并按项目相册整理。
- 社区发现:分享公开相册,让其他人浏览并评论。
ユーザー操作ガイド
写真をアップロードし、アルバムを作り、地図をコミュニティに共有します。
PhotoGeoMap は位置情報付きの写真をインタラクティブな地図に表示します。このガイドでは、アップロードから公開共有までの基本操作を説明します。
写真をアップロード
- ログインします。PhotoGeoMap を開き、メニューから Login を選びます。
- アップロード画面を開きます。地図メニューまたは Dashboard から Upload photos を開きます。
- 画像を選択します。必須項目は画像ファイルだけです。
- GPS を自動入力します。写真に EXIF GPS 情報がある場合、緯度と経度が自動入力されます。
- 任意項目を追加します。タイトル、キャプション、アルバム、代替画像 URL を入力できます。キャプションにはリンクも入れられます。
- 写真を保存します。座標がある場合、保存後に写真が地図上に表示されます。
ヒント:GPS 情報がない場合は、緯度と経度を手動で入力してから保存できます。
画面で見る操作手順
アルバムの作成と管理
- Dashboard を開きます。アルバム管理はオーナー Dashboard で行います。
- アルバムを作成します。アルバム名を入力し、必要に応じて説明を追加します。
- 写真を割り当てます。写真のアップロードまたは編集時にアルバムを選択します。
- 名前変更または削除。Your albums から既存アルバムを変更できます。
- Default Album を使います。アルバム未指定の写真は自動的に Default Album に入ります。
地図を見る
訪問者はログインしなくても公開地図を閲覧できます。ログイン中のユーザーは自分の写真が標準で表示されます。View all で現在の地図オーナーの全写真を表示し、アルバム選択で特定エリアにフォーカスできます。
アルバムをコミュニティに共有
- Dashboard を開きます。Your albums で対象アルバムを探します。
- コミュニティ共有を有効にします。Share this album in Community にチェックを入れます。
- 説明を追加します。アルバムの内容を説明します。
- 設定を保存します。アルバムは Community ページに地図プレビュー付きで表示されます。
- Discussion を開きます。共有アルバムごとに専用の議論ページがあります。
アルバムで議論
アルバムの議論ページでは、埋め込み地図を見ながらコメントを読めます。ログインユーザーはコメント投稿や返信ができます。コメントのアバターは PhotoGeoMap でアップロードした同じアバターを使用します。
利用例
- 旅行記録:旅行写真をアップロードし、ルートのような地図を友人に共有します。
- 家族アルバム:家族写真をまとめ、公開閲覧リンクを親族に送れます。
- イベント地図:祭り、学校行事、ミートアップの写真を集めて議論できます。
- 場所別ポートフォリオ:写真家、ガイド、地域ビジネスが場所ごとに作品を見せられます。
- 現地調査:GPS 付きの現場写真を記録し、プロジェクト別に整理します。
- コミュニティ発見:公開アルバムを共有し、他の人が閲覧・コメントできます。